Expand a Synology Hybrid RAID volume
504 words, 3 minutes
I own a Synology DS409slim with two 1TB Toshiba and two 500GB Western Digital disks. Configured using SHR (Synology Hybrid RAID), it allows one volume split on those four disks. I bought this NAS because it uses 2.5" disks and because of the SHR feature.
I had one 1TB Toshiba in my MacBook but I took it off and planned on putting it in the NAS, replacing one of the 500GB disk. Here’s what happened.
The first step is to upgrade the firmware. This step is not required but I wanted to be sure any last bug would be solved. I’m am running DSM 3.1-1613.
Then, backup every files that you wouldn’t ever want to loose. After all, any modification on a system might lead to data loss. After my modifications, I didn’t notice any.
Now, let’s go for the replacement. I kept the NAS powerred-on as it supports hot-plug.
Choose the disk to be removed and take it out of the syno. After a few seconds, the NAS will start to beep. Either log-in to the administration GUI and turn beep off or let it beep until you replace the disk. I did the latter as I wanted to hear when the DS409slim would discover the new disk.
Unscrew the disk, take it out of the bay and replace it with the new one. When done, place that new disk in the NAS. After a few seconds, the syno stopped beeping.
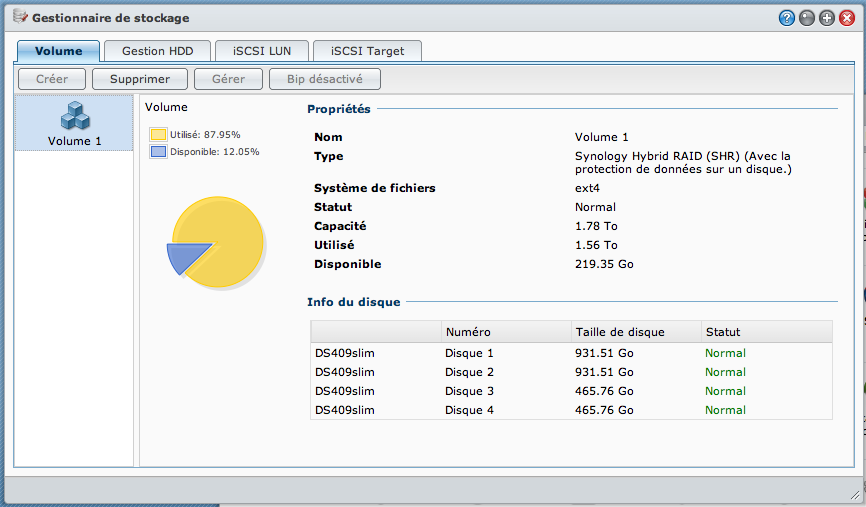
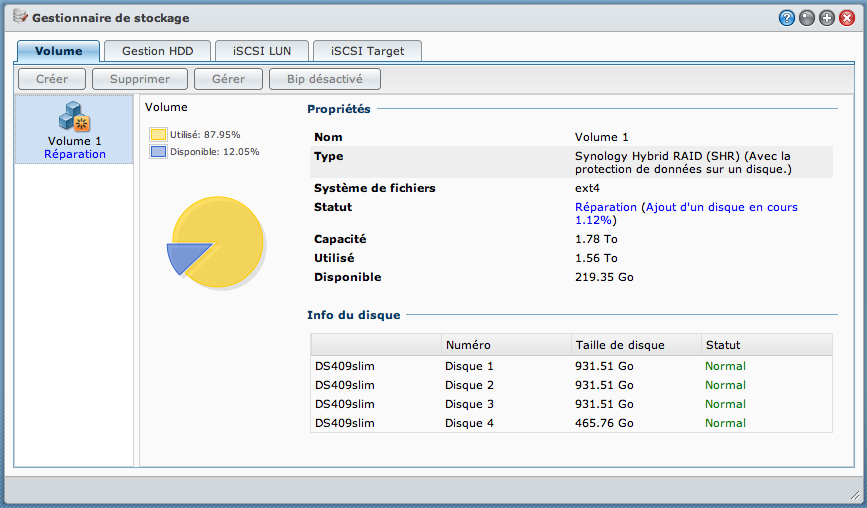
Log-in to the administration GUI, if not already done. Go to the “Storage Management”. You should be presented with the volume management wizard. The action you’re expecting is “Repair”. Select that option and click “Next”. You’ll be presented with a list of disks to be used to repair the RAID. In my case, there “only” were the 1TB disk I just plugged-in. Select it and click “Next”. Review the parameters and click “Apply”. Acknowledge the network and services warning and the repair will begin.
It took about 6 minutes before the NAS told me the data were available again. Since then, the rebuild and expand process began. This means that 6 minutes after the disk replacement, the volume was still using the previous size. I didn’t try to write things on it. But all the data I read was accessible in a delay that looked like the usual one. If I look at the mail notifications, the whole process (repair, expand, verification) started on 2011/04/25 12:58 and ended on 2011/04/26 01:42 ; data availability started at 2011-04-25 13:04.
The initial volume, using 2x1TB + 2x500GB, was providing 1.78TB of disk space.
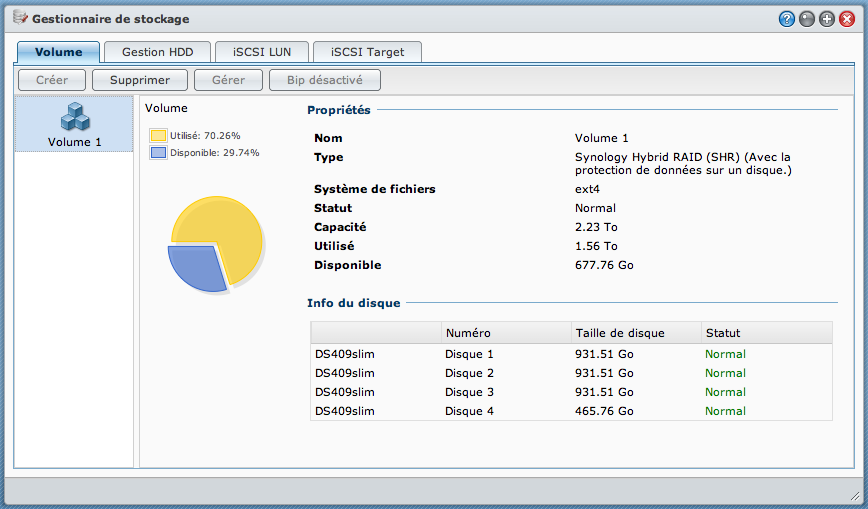
The new volume, using 3x1TB + 1x500GB, provides 2.23TB of disk space.
This is still better than “standard” RAID that would only use 500GB on the
three 1TB disks but I should definitively upgrade the last disk when the prices
will lower. I bought the NAS to be able to replace with bigger disks on demand
and that’s exactly what it does. This is a really great box!
That’s All Folks!